9/26/2013

7” Infotmic X210 X220 tablet PC Android 2.3.3 official firmware

Upgrade your Adobe Flash Player to v11.1.111.5 in Infotmic x210 x220 | Tablet Firmware

Android 2.3.3 firmware for 7” Infotmic x210 x220 800*480px tablet PC.


Support Adobe Flash Player 11.1(Click here for detail).


How to install the firmware?


1).Using a TF card FAT32(a 2gb or less would be better) and extract the downloaded file and put folder “Android” directly into the root of the TF card;


2).Turn off the tablet and put the TF card into the tablet.Press “Power On”,the tablet would start to search the firmware file automatically;


3).Have a look the words in the screen and make sure no errors.About 3 to 5 minutes,you can remove the TF card;


Click 7_inch_android1-5_18506_infotmic_X210_2.3.3.zip to download now.


or use the following link
7_inch_android1-5_18506_infotmic_X210_2.3.3.zip

Before you do any firmware-install,please make sure your device is fully charged!


If you have any doubt about the firmware,don't hesitate to leave us a comment!'
__________________

Nokia 2600c And 2630c Insert SIM Solution


nokia 6210c mic solution

nokia 6210c mic solution


Nokia 2330c hard solution hot

https://blogger.googleusercontent.com/img/b/R29vZ2xl/AVvXsEhQe7ozJw05FEnkf-IwY9lxNVyz7n0txmH4eZmOGkw1xARkX_Qgdt4dUviEdGFeuSIz5kHD-NDCpDi4lVTicfCt5B0c9zBSKrLedlGqU1mrVB5p4jOOJX_0QtWPm9igbt24bdZ57hUmOWi9/s320/Nokia+2330c.jpg
 
Nokia 2330c hard solution hot
download

Samsung E1085 Charging Solution


Samsung E1085 Charging Solution


Samsung GT-E1085F Charging Solution. Make This Solution Go To Here..

Samsung B5702 All Hardware Solution


Nokia 1202 not charging solution


successfully Ulock Bootloader and sim lock Lumia 800 RM-801

Thanx infinity best

Info


Quote:
Phone found!
WP7x Nokia Phone detected
Read info... Ok

=== Main Info ===
Phone : RM-801|NOKIA Lumia 800
Phone SwVer : 1750.0805.8773.12220
Phone IMEI : 359289045264187
ProductCode : 059L733
HW Version : 112.1402.2.3
=== Other ===
Life Timer : 0
Battery Life : 94
SerialNum : 0031FD4AB
Base Code : 059J2N6
ModuleCode : 0205051
NCSD Ver : 1.9
BT MAC : 6CE907348CE10000000000
Wlan MAC : 6CE9071B2CBB00
Public ID: DF89264EC33BC121B13954F6E41739

Unlock BootLoader

Quote:
Phone found!
WP7x Nokia Phone detected
Read info... Ok

Setting device to OSBL mode...
Waiting for USB device...
Connection opened successfully
Establish connection with device...
Kick ...
OSBL alive
Init Ok
OSBL info
Prt : 1.1
Ver : 1.1.0.6
Bld : 12
Tms : 17.02.2012 / 12:40:05

osbl.cer , Hash : 0C203F23776466E755E9955A9F8F9A39A0888B8E
osbl.mbn , len : 0x000D4A28 , Type : Data
Will flash 1 regions
OSBL flashing done

Flashing done!
Reboot device Ok

All done, Phone will Reboot Now
If phone Power On - Wait, until BEST detect it
Back to Extended, Press Check/Info
Check/Info

Quote:
Phone found!
WP7x Nokia Phone detected
Read info... Ok

Setting device to OSBL mode...
Waiting for USB device...
-> Phone not found..
Active QC/DLOAD not found, trying enumerate drives...
Checking for device...
Phone disconected!
Unlock

Quote:
Connect phone on selected interface...

Qualcomm MMC Storage , rev : 2.31
Drive space : 14 GiB
Drive Index : 1

Processing MBR...
[0] MBR
Name : SECBOOT
Start : 0x00000001
Lenght : 0x000003E8
[1] MBR
Name : OSBL
Start : 0x000003E9
Lenght : 0x00000BB8
[2] MBR
Name : MODEM_FS
Start : 0x00000FA1
Lenght : 0x000493E0
[3] MBR
Name : EBR
Start : 0x0004A381
Lenght : 0x01D51C7F
Processing EBR...
[4] EBR
Name : NK_PMM
Start : 0x0004A386
Lenght : 0x00000080
[5] EBR
Name : SFSNV
Start : 0x0004A406
Lenght : 0x00001800
[6] EBR
Name : SFSBKP0
Start : 0x00060000
Lenght : 0x00001800
[7] EBR
Name : SFSBKP1
Start : 0x00061800
Lenght : 0x00001800
[8] EBR
Name : WP_USER
Start : 0x00080000
Lenght : 0x01D38FFF

Check product info...
Current OSBL mode : QUALCOMM
Found : SeaRay
Model : RM-801 , RM-819
Model : Lumia 800
Phone Id set to : 059L733_0031FD4AB

Processing Lumia Wp7x Patch Unlock
Found Location #1
State : Not Patched
Patch ...
Patch Ok
Found Location #2
State : Not Patched
Patch ...
Patch Ok

Unlock Code (PIN) : 00000000
Unlock Code (PUK) : 0000000000
1. Power Up phone
1.0 Press Restart button
1.1 Or Reconnect Battery / 15sec. hold PowerOn, after PowerOn
2. Enter code (PIN or PUK)
3. After PIN/PUK accepted, you can restore state via "Restore SimLock state"
(c) Wp7x Patch Unlock : Bph&co (Genie Projects)
All done!

Lumia eMMC drive disconected!

Samsung C3222 power weys 100% tested solution

Iphone Ipad Ipod Accessories >> lphone 5 parts >> iphone5 lcd+touch complete

iphone 5 lcd+touch complete_Black and white.
*Description:
Features: for Iphone Spare Parts
1.high quality;
2.original new ;
3.protective package;
4.offer all kinds of parts;
5.guarantee time:1 year.
*All the iphone Parts must pass the inspection of our professional QC team;
Delivery:2-3day working time;We can offer all kinds of mobile phone accessories;
Product Warranty: We have good after-sales services.
RZM company has over 10 years experience in this field. With the effort of our
professional QC team and Purchaser team, we are able to supply the best quality
of the products to our customers. Meanwhile, with the hard-working of our
logistic department, the goods can be sent to our customers quickly and
safely.If you have interests in our products, please contact us now, our sales
team can do you the best favor and support. If we are not on line, please leave
your name and contact details, eg. email, MSN, Skype, ICQ, telephone number etc.

nokia 110 lcdway solution 100%tested

Install Android 4.1.2 On Galaxy S2 Using RootBox Custom ROM===2012==2013

Samsung Galaxy S2 users update their device to Android 4.1.2 using RootBox Custom ROM. This is not an official Android 4.1.2 ROM by Samsung.
Features of Rootbox Android 4.1.2
Based on JB 4.1.2 – Built from RootBox Sources
HSPA+ Support
A2DP Support
T9 Dialer
Cherry picked fixes from CM
OTA Update
ExTweaks integrated in Settings – if ExTweaks installed in /system/app
Init.d Support
AOKP Features

To use the Custom ROM you require a rooted device. You can check if your device is rooted by installing Root Checker from Google Play. RootBox ROM is in development stage so you may experience bugs. As per the developer HWcomposer is not working and there is no option to swap Internal/External.
The guide mentioned below is only for Samsung Galaxy S2 I9100 and not for any other device. You can check your device model number by going to Settings >> About Phone.
AM NOT be held liable of any damage done to your device while following the below mentioned procedure.


Install Android 4.1.2 on Galaxy S2 using RootBox Custom ROM
Take a complete backup of data,apps and settings as the procedure may wipe your data.
Make sure that the battery of device has a minimum charge of 60%.
Enable “USB debugging” on your device by going to Settings >> Developer options >> Enable USB debugging.
Download RootBox ROM from here and Google Apps Package from here.
  • Copy both the zip files to SD-Card of your device without extracting.
  • Switch off device and enter into recovery mode. To enter recovery press and hold the Volume Up and Volume Down and Power buttons.
  • Take a Nandrop back up of your existing ROM. Select Backup and Restore option from the recovery mode and then select backup again.
  • Select “wipe data/factory reset” and confirm to wipe all data. Wipe “Dalvik Cache”.
  • Select “install zip from sdcard” and then select “choose zip from sdcard”. Navigate to RootBox ROM file and select to install. Wait till installation is complete.
  • Repeat the procedure to install Google Apps Package.
  • Select “go back” and then select “reboot system now”.
  • Android 4.1.2 Jelly Bean on Galaxy S2 with RootBox ROM is installed.

IDM for download 7.1_Full-Free-2013


FREE IDM for download 7.1_Full

https://blogger.googleusercontent.com/img/b/R29vZ2xl/AVvXsEgE-4pjw1ZHYiVXx_XWg0uwgE8Ec2Rx2qgo5sOvHfz6typdtgBxZSlKCU5ZNUgGUktm8V2jcYsLARR-FIG0trkcblSHoWpnkaGuKjIDfgYVAqjkTe4PkjhPUXv8kUag_CCwFKayz8KhdD0s/s1600/IDM+6.12+Final+Build+21.jpg
Download

iphone 3gs 6.0.1 searching on factory unlocked solve by full tutorial

downgrade ur baseband here is full tutorial for u

http://st2.gsmarena.com/vv/pics/apple/apple-iphone-3gs-01.jpg

How to Downgrade Your iPhone 3GS, 3G Baseband from iPad's 06.15 baseband to 05.13.04

All about nokia 101 lcd ways solve

All about nokia 101 lcd ways
http://forum.gsmhosting.com/vbb/attachment.php?attachmentid=294588&stc=1&d=1353739715

All Nokia phone Software Hardware get new page.....2013

http://www9.pcmag.com/media/images/363277-nokia-lumia-822.jpg?thumb=y

All about Nokia E52 charging solution 100% tested

its shorted...

i change pearl ic or power ic same problem

 
i tryied to search here but no solution
this is your solution

All about nokia x2-02(rm-694) camera solution

x2 02 camera in restart 
download dcc file here
X2-02.rar

All about Galaxy S 2 Shipped Modem Collection 2013


Vodafone Australia DUKF4 - GO (CWM Flashable)


Vodafone Australia DUKF4 - GO


Thailand DCKF1 - GO


Telstra Australia DVKF2 - GO


Telecom New Zealand DOKG2- GO


Cellcom Israel JIKJ1 - GO


Pelephone Israel JJKF3 - GO


Cellcom Israel JIKI2 - GO

Pelephone Israel JJKI2 - GO


Thailand DCKL1 - GO

Thailand DCKL1 - GO (CWM flashable)

***New I9100T Modem from Vodafone Australia*** DUKJ1- GO
 Modems collected by others
VEYKA'S MODEM COLLECTION (CWM flashable) (thanks to veyka): GO


KALPIK'S MODEM COLLECTION (CWM flashable) (thanks to kalpik): GO

OBIHOERNCHEN'S MODEM COLLECTION (CWM flashable) (thanks to obihoernchen):
GO


CHRIS264'S MODEM COLLECTION (thanks to chris264): GO

PANGIOTI'S MODEM COLLECTION (thanks to pangiotis24): GO
http://forum.gsmhosting.com/vbb/attachment.php?attachmentid=297151&d=1356952990

GSM SOLUTION Nokia N8 insert sim...Done

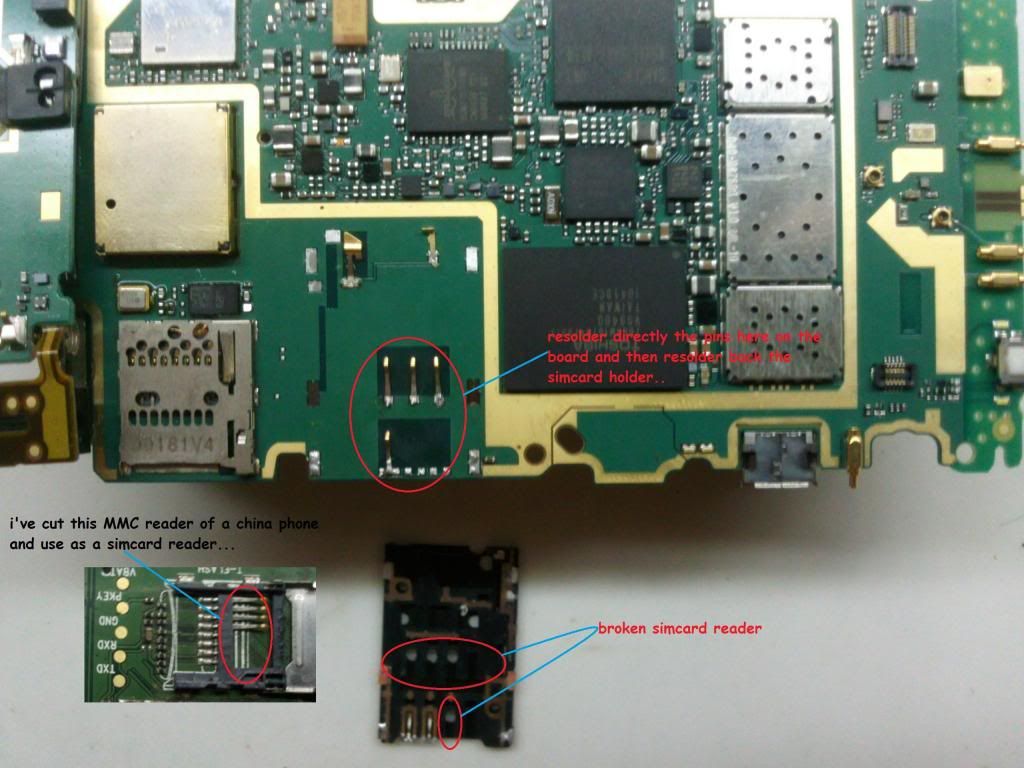
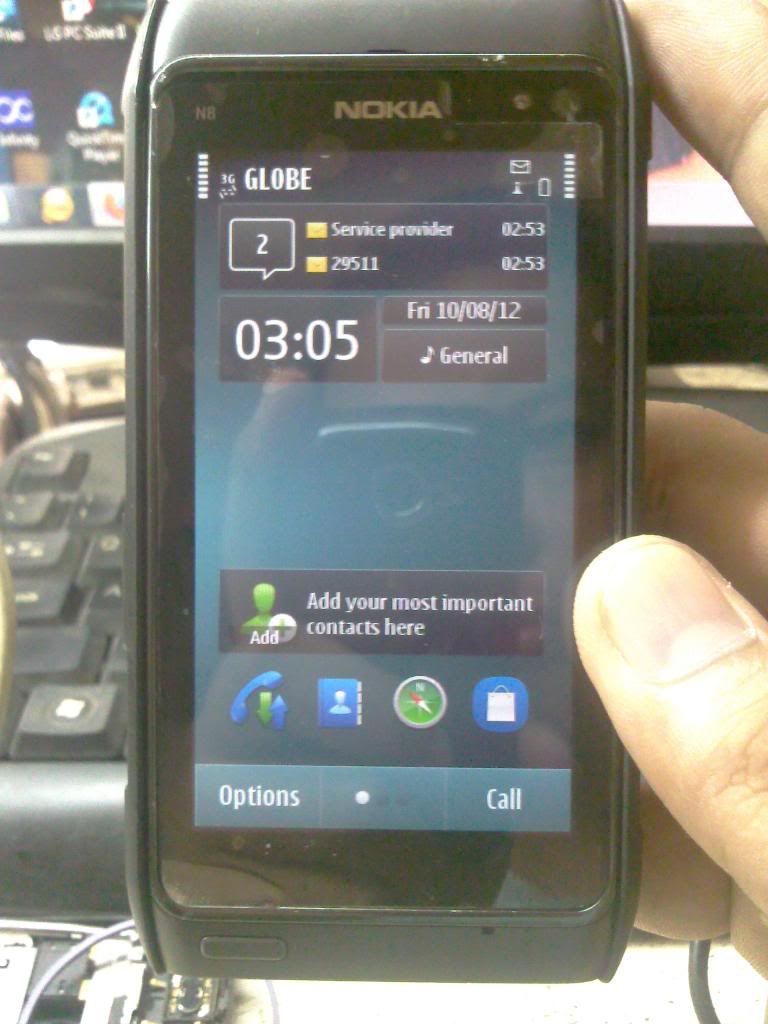
UNIT: Nokia N8

DIAGNOSTIC: Insert sim card(Simcard reader broken)

SOLUTION:
  • Since i don't have available simcard reader...this is what i do..shown in this image


Here's my finished product...


hope it will help...

Samsung all about samsung s5830 ace hard-reset

hard-reset

download mode

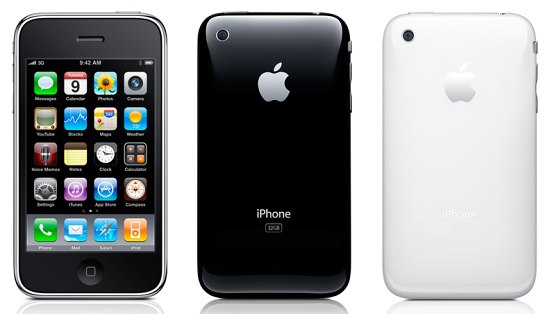
Iphone 3gs sucessfully restored 5.1.1 step by stepnew year 2013

Iphone 3gs sucessfully restored 5.1.1 step by step.

Step 1:Extract redsn0w_win_0.9.15b3.zip file.
Step 2:Run as administrator redsn0w_win_0.9.15b3.exe.
Step 3ress “Extras”

Step 4:Now you have to choose the “Even more”
i
Step 5:Now you have to choose the “Restore”

Step 6:Now connect your iphone 3gs with system.
step 7:Tap on IPSW and select the iOS iPhone2,1_5.1.1_9B206_Restore
IPSW form your computer.

Step 8:Click “Yes”

Step 9:Put Your device into DFU mode
(or use the Steps below)

Hold down power button and home button both at the same time for
10 seconds
After the 10 seconds release the power button and still pressing on the
home button for another 10 seconds.


Step 10:wait for restore iphone sucessfully...

Step 11:Now click back for jailbrake you have to choose the “Select IPSW”&
choose iOS iPhone2,1_5.1.1_9B206_Restore IPSW form your system.

Step 12:Select “ok”&“Yes”&click “jailbreake”& install “Cydia”& click next for
wait done.

Step 13:upadte “Cydia” & install “Ultrasnow” file.Wait for Signal 1 min & go
enjoy “Sorry for my bad language”.
Step 14:If u like my post do the click “THANKS”.

Sprint GalaxyS3 Rooting the Easy Way see all gsm user

Beginners Guide

I know there are several how to root posts here but none are written in a way for the noob to understand. I decided to put together a detailed step by step guide for the beginner. This method isn't any different and doesn't bring anything new but it is written in a way that is easy to follow and understand. I would like to thank Team Epic for all their contributions.

WARNING

Skunk Ape1 is not responsible for your phone. This is for the SPRINT GS3 ONLY!! By Using this guide you are assuming all the risks.

ONE FILE TO DOWNLOAD ROOT KIT
I decided to make all the files for rooting, pictures and instructions.txt in a single zip file. So (if you prefer) you can download the single zip file, put it on your desktop, double click on "Sprint GS3 Root Kit.zip" and drag the "Sprint GS3 Root Kit" folder onto your desktop. Everything needed for root and recovery is in that folder. You can use the instructions in the kit or you can come back to this page. I've included instructions in both and text and pdf file formats.

Sprint GS3 Root Kit


-----Preparing your computer-----

Double click on the Sprint GS3 Root Kit and drag the Sprint GS3 Root Kit Folder to your Desktop.


-----NOTE-----

Your Samsung Drivers MUST be installed correctly on your computer prior to continuing.

-----Install your Sprint Samsung Drivers-----

Open "Sprint GS3 Root Kit" Folder
Double click on "Sprint-Samsung-USB-Driver.exe"

Wait until the software installs completely before plugging your device into the computer. When you have completed driver installation.

Plug your device into the computer with your usb cord. The computer should now tell you it is installing drivers, click on the details and wait until there is a green check by all the drivers. Unplugging your device before it's complete will cause you problems...


-----Preparing your Phone-----

Open "Files to put on your phone" Folder and copy "TeamEpic-Root-from-Recovery-v5.zip" to either you internal or external sdcard. Or you can download it directly to phone from this url: http://www.mediafire.com/?h203ct9rbn0cmnp and move the downloaded file to your internal or external sdcard.

-----NOTE-----

Download mode is achieved by turning off the phone. Then pressing and holding "volume down, power button and the (physical) home button simultaneously. You will continue to hold all 3 buttons until you see a warning. Then press the volume up button and you will be in download mode.


-----TIP-----

Recovery mode is a bit trickier. If you're a second too early or too late, your phone will skip going into recovery and boot normally. If this happens you will have to repeat the Odin process in it's entirety. So unless you are familiar with this, I would give it a few practice runs before starting Odin

Recovery mode is achieved pressing and holding "volume UP, power button and the (physical) home button simultaneously. Watching the screen closely, release all 3 buttons as soon as you see the word Samsung. If timed correctly it will boot into recovery in about 10-20 seconds (after releasing). Remember if you are too early or late the phone will boot normally and skip recovery.

-----WARNING-----
DO NOT LET THE PHONE BOOT AFTER FLASHING RECOVERY IN ODIN.. IF YOUR PHONE BOOTS BEFORE FLASHING TEAM EPIC ROOT FROM RECOVERY IN CWM, CUSTOM RECOVERY WILL NOT STICK AND YOU WILL HAVE TO START OVER..


-----Using Odin-----

For those who prefer TWRP Recovery (Which isn't in the kit) I am adding it here. Just replace the recovery.tar file provided in the kit with this one and you will have the most recent TWRP Recovery. Just flash it in Odin the same way you would the cwm provided in the kit.

Download TWRP 2.3.1.0 here.

1. Open the "Odin307" folder and right click on "Odin3 v3.07.exe" and choose run as administrator. Odin will open.

2. Remove battery cover from phone for future access

3. Place your phone into download mode. See above Download note.

4. Plug your usb cord to your phone and computer and wait until you see any number and com in the com block

5. Click on the PDA button and browse to "recovery.tar.md5" in your Root GS3 Folder.

6. Verify that both Auto Reboot and F. Rest Time are UNCHECKED.


7. If everything is like the picture click on the start button. It should move very quickly as recovery is a small file. It is normally completed within 10-20 seconds (depending on the speed of your computer and usb port).

-----NOTE-----

Sometimes Odin will not show "PASS!" in the top left corner until after the phone is unplugged. So observe the message window as well. If it shows "All Threads completed (Succeed 1 / Failed 0) you should be fine.

8. Remove Battery and disconnect phone from computer.


-----Flashing Root in Recovery-----

1. Install battery

2. Place your phone into Recovery Mode.


-----INFO-----The Recovery that you installed is a touch screen recovery. You will not need use the buttons to navigate through the recovery menus.

3. Once in recovery tap on "install zip from sdcard".

4. Now you will tap either "choose zip from sdcard" or "choose zip from external sdcard"

5. Scroll by swyping up and down on screen. Tap on "TeamEpic-Root-from-Recovery-v5.zip.

6. Tap on "- Yes - Install TeamEpic-Root-from-Recovery -v5.

Once complete, tap the "go back" button once and then tap "reboot system now".

You Are now fully rooted with custom recovery installed.

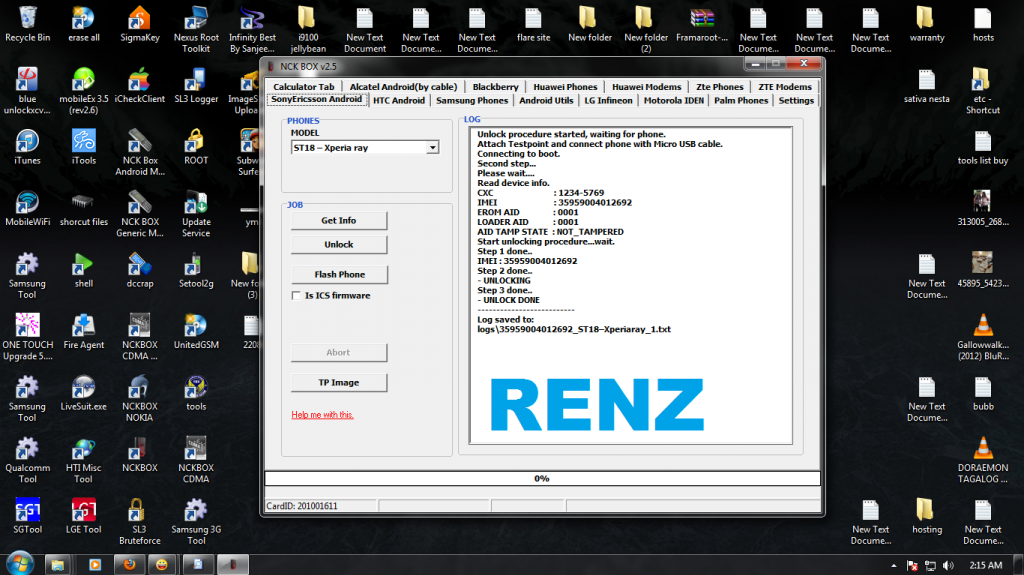
samsung gt-c5212 speaker solution 2013 all about samsung http://forum.gsmhosting.com/vbb/attachment.php?attachmentid=297185&d=1357012399 Email This BlogThis! Share to Twitter Share to Facebook No comments : Sprint GalaxyS3 Rooting the Easy Way see all gsm user Beginners Guide I know there are several how to root posts here but none are written in a way for the noob to understand. I decided to put together a detailed step by step guide for the beginner. This method isn't any different and doesn't bring anything new but it is written in a way that is easy to follow and understand. I would like to thank Team Epic for all their contributions. WARNING Skunk Ape1 is not responsible for your phone. This is for the SPRINT GS3 ONLY!! By Using this guide you are assuming all the risks. ONE FILE TO DOWNLOAD ROOT KIT I decided to make all the files for rooting, pictures and instructions.txt in a single zip file. So (if you prefer) you can download the single zip file, put it on your desktop, double click on "Sprint GS3 Root Kit.zip" and drag the "Sprint GS3 Root Kit" folder onto your desktop. Everything needed for root and recovery is in that folder. You can use the instructions in the kit or you can come back to this page. I've included instructions in both and text and pdf file formats. Sprint GS3 Root Kit -----Preparing your computer----- Double click on the Sprint GS3 Root Kit and drag the Sprint GS3 Root Kit Folder to your Desktop. -----NOTE----- Your Samsung Drivers MUST be installed correctly on your computer prior to continuing. -----Install your Sprint Samsung Drivers----- Open "Sprint GS3 Root Kit" Folder Double click on "Sprint-Samsung-USB-Driver.exe" Wait until the software installs completely before plugging your device into the computer. When you have completed driver installation. Plug your device into the computer with your usb cord. The computer should now tell you it is installing drivers, click on the details and wait until there is a green check by all the drivers. Unplugging your device before it's complete will cause you problems... -----Preparing your Phone----- Open "Files to put on your phone" Folder and copy "TeamEpic-Root-from-Recovery-v5.zip" to either you internal or external sdcard. Or you can download it directly to phone from this url: http://www.mediafire.com/?h203ct9rbn0cmnp and move the downloaded file to your internal or external sdcard. -----NOTE----- Download mode is achieved by turning off the phone. Then pressing and holding "volume down, power button and the (physical) home button simultaneously. You will continue to hold all 3 buttons until you see a warning. Then press the volume up button and you will be in download mode. -----TIP----- Recovery mode is a bit trickier. If you're a second too early or too late, your phone will skip going into recovery and boot normally. If this happens you will have to repeat the Odin process in it's entirety. So unless you are familiar with this, I would give it a few practice runs before starting Odin Recovery mode is achieved pressing and holding "volume UP, power button and the (physical) home button simultaneously. Watching the screen closely, release all 3 buttons as soon as you see the word Samsung. If timed correctly it will boot into recovery in about 10-20 seconds (after releasing). Remember if you are too early or late the phone will boot normally and skip recovery. -----WARNING----- DO NOT LET THE PHONE BOOT AFTER FLASHING RECOVERY IN ODIN.. IF YOUR PHONE BOOTS BEFORE FLASHING TEAM EPIC ROOT FROM RECOVERY IN CWM, CUSTOM RECOVERY WILL NOT STICK AND YOU WILL HAVE TO START OVER.. -----Using Odin----- For those who prefer TWRP Recovery (Which isn't in the kit) I am adding it here. Just replace the recovery.tar file provided in the kit with this one and you will have the most recent TWRP Recovery. Just flash it in Odin the same way you would the cwm provided in the kit. Download TWRP 2.3.1.0 here. 1. Open the "Odin307" folder and right click on "Odin3 v3.07.exe" and choose run as administrator. Odin will open. 2. Remove battery cover from phone for future access 3. Place your phone into download mode. See above Download note. 4. Plug your usb cord to your phone and computer and wait until you see any number and com in the com block 5. Click on the PDA button and browse to "recovery.tar.md5" in your Root GS3 Folder. 6. Verify that both Auto Reboot and F. Rest Time are UNCHECKED. 7. If everything is like the picture click on the start button. It should move very quickly as recovery is a small file. It is normally completed within 10-20 seconds (depending on the speed of your computer and usb port). -----NOTE----- Sometimes Odin will not show "PASS!" in the top left corner until after the phone is unplugged. So observe the message window as well. If it shows "All Threads completed (Succeed 1 / Failed 0) you should be fine. 8. Remove Battery and disconnect phone from computer. -----Flashing Root in Recovery----- 1. Install battery 2. Place your phone into Recovery Mode. -----INFO-----The Recovery that you installed is a touch screen recovery. You will not need use the buttons to navigate through the recovery menus. 3. Once in recovery tap on "install zip from sdcard". 4. Now you will tap either "choose zip from sdcard" or "choose zip from external sdcard" 5. Scroll by swyping up and down on screen. Tap on "TeamEpic-Root-from-Recovery-v5.zip. 6. Tap on "- Yes - Install TeamEpic-Root-from-Recovery -v5. Once complete, tap the "go back" button once and then tap "reboot system now". You Are now fully rooted with custom recovery installed. Email This BlogThis! Share to Twitter Share to Facebook No comments : Iphone 3gs sucessfully restored 5.1.1 step by stepnew year 2013 Iphone 3gs sucessfully restored 5.1.1 step by step. Step 1:Extract redsn0w_win_0.9.15b3.zip file. Step 2:Run as administrator redsn0w_win_0.9.15b3.exe. Step 3ress “Extras” Step 4:Now you have to choose the “Even more” i Step 5:Now you have to choose the “Restore” Step 6:Now connect your iphone 3gs with system. step 7:Tap on IPSW and select the iOS iPhone2,1_5.1.1_9B206_Restore IPSW form your computer. Step 8:Click “Yes” Step 9:Put Your device into DFU mode (or use the Steps below) Hold down power button and home button both at the same time for 10 seconds After the 10 seconds release the power button and still pressing on the home button for another 10 seconds. Step 10:wait for restore iphone sucessfully... Step 11:Now click back for jailbrake you have to choose the “Select IPSW”& choose iOS iPhone2,1_5.1.1_9B206_Restore IPSW form your system. Step 12:Select “ok”&“Yes”&click “jailbreake”& install “Cydia”& click next for wait done. Step 13:upadte “Cydia” & install “Ultrasnow” file.Wait for Signal 1 min & go enjoy “Sorry for my bad language”. Step 14:If u like my post do the click “THANKS”. Email This BlogThis! Share to Twitter Share to Facebook No comments : Samsung all about samsung s5830 ace hard-reset hard-reset download mode Email This BlogThis! Share to Twitter Share to Facebook No comments : GSM SOLUTION Nokia N8 insert sim...Done UNIT: Nokia N8 DIAGNOSTIC: Insert sim card(Simcard reader broken) SOLUTION: Since i don't have available simcard reader...this is what i do..shown in this image Here's my finished product... hope it will help... Email This BlogThis! Share to Twitter Share to Facebook No comments : all about Asha200 change key solution nokia 200 asha keypad remove ic keypad and make jumper http://forum.gsmhosting.com/vbb/attachment.php?attachmentid=297151&d=1356952990 Email This BlogThis! Share to Twitter Share to Facebook No comments : all about Samsung E1080 E081 Sim ways 408d3 - Click for Next Image... Email This BlogThis! Share to Twitter Share to Facebook No comments : All about Galaxy S 2 Shipped Modem Collection 2013 Vodafone Australia DUKF4 - GO (CWM Flashable) Vodafone Australia DUKF4 - GO Thailand DCKF1 - GO Telstra Australia DVKF2 - GO Telecom New Zealand DOKG2- GO Cellcom Israel JIKJ1 - GO Pelephone Israel JJKF3 - GO Cellcom Israel JIKI2 - GO Pelephone Israel JJKI2 - GO Thailand DCKL1 - GO Thailand DCKL1 - GO (CWM flashable) ***New I9100T Modem from Vodafone Australia*** DUKJ1- GO Modems collected by others VEYKA'S MODEM COLLECTION (CWM flashable) (thanks to veyka): GO KALPIK'S MODEM COLLECTION (CWM flashable) (thanks to kalpik): GO OBIHOERNCHEN'S MODEM COLLECTION (CWM flashable) (thanks to obihoernchen): GO CHRIS264'S MODEM COLLECTION (thanks to chris264): GO PANGIOTI'S MODEM COLLECTION (thanks to pangiotis24): GO Email This BlogThis! Share to Twitter Share to Facebook No comments : Saturday, 29 December 2012 All about nokia x2-02(rm-694) camera solution x2 02 camera in restart download dcc file here X2-02.rar Email This BlogThis! Share to Twitter Share to Facebook No comments : All about Nokia E52 charging solution 100% tested its shorted... i change pearl ic or power ic same problem i tryied to search here but no solution this is your solution Email This BlogThis! Share to Twitter Share to Facebook No comments : All Nokia phone Software Hardware get new page.....2013 http://www9.pcmag.com/media/images/363277-nokia-lumia-822.jpg?thumb=y All Nokia phone Software Hardware get new page..... Email This BlogThis! Share to Twitter Share to Facebook No comments : Friday, 28 December 2012 All about nokia 101 lcd ways solve All about nokia 101 lcd ways http://forum.gsmhosting.com/vbb/attachment.php?attachmentid=294588&stc=1&d=1353739715 Email This BlogThis! Share to Twitter Share to Facebook No comments : Monday, 24 December 2012 iphone 3gs 6.0.1 searching on factory unlocked solve by full tutorial downgrade ur baseband here is full tutorial for u http://st2.gsmarena.com/vv/pics/apple/apple-iphone-3gs-01.jpg How to Downgrade Your iPhone 3GS, 3G Baseband from iPad's 06.15 baseband to 05.13.04 Email This BlogThis! Share to Twitter Share to Facebook No comments : IDM for download 7.1_Full-Free-2013 FREE IDM for download 7.1_Full http://3.bp.blogspot.com/-Lqt69-U8Uyc/UGUP_D7gcjI/AAAAAAAAFYw/H-fLG8gFQYM/s1600/IDM+6.12+Final+Build+21.jpg Download Email This BlogThis! Share to Twitter Share to Facebook No comments : Wednesday, 7 November 2012 Install Android 4.1.2 On Galaxy S2 Using RootBox Custom ROM===2012==2013 Samsung Galaxy S2 users update their device to Android 4.1.2 using RootBox Custom ROM. This is not an official Android 4.1.2 ROM by Samsung. Features of Rootbox Android 4.1.2 Based on JB 4.1.2 – Built from RootBox Sources HSPA+ Support A2DP Support T9 Dialer Cherry picked fixes from CM OTA Update ExTweaks integrated in Settings – if ExTweaks installed in /system/app Init.d Support AOKP Features To use the Custom ROM you require a rooted device. You can check if your device is rooted by installing Root Checker from Google Play. RootBox ROM is in development stage so you may experience bugs. As per the developer HWcomposer is not working and there is no option to swap Internal/External. The guide mentioned below is only for Samsung Galaxy S2 I9100 and not for any other device. You can check your device model number by going to Settings >> About Phone. AM NOT be held liable of any damage done to your device while following the below mentioned procedure. Install Android 4.1.2 on Galaxy S2 using RootBox Custom ROM Take a complete backup of data,apps and settings as the procedure may wipe your data. Make sure that the battery of device has a minimum charge of 60%. Enable “USB debugging” on your device by going to Settings >> Developer options >> Enable USB debugging. Download RootBox ROM from here and Google Apps Package from here. Copy both the zip files to SD-Card of your device without extracting. Switch off device and enter into recovery mode. To enter recovery press and hold the Volume Up and Volume Down and Power buttons. Take a Nandrop back up of your existing ROM. Select Backup and Restore option from the recovery mode and then select backup again. Select “wipe data/factory reset” and confirm to wipe all data. Wipe “Dalvik Cache”. Select “install zip from sdcard” and then select “choose zip from sdcard”. Navigate to RootBox ROM file and select to install. Wait till installation is complete. Repeat the procedure to install Google Apps Package. Select “go back” and then select “reboot system now”. Android 4.1.2 Jelly Bean on Galaxy S2 with RootBox ROM is installed. Email This BlogThis! Share to Twitter Share to Facebook No comments : nokia 110 lcdway solution 100%tested Email This BlogThis! Share to Twitter Share to Facebook No comments : Tuesday, 6 November 2012 Symphony D30 Mmc Solution By..::rubelstar::..*2012 Email This BlogThis! Share to Twitter Share to Facebook No comments : Wednesday, 24 October 2012 Iphone Ipad Ipod Accessories >> lphone 5 parts >> iphone 5 usb cable Email This BlogThis! Share to Twitter Share to Facebook No comments : Iphone Ipad Ipod Accessories >> lphone 5 parts >> iphone5 lcd+touch complete iphone 5 lcd+touch complete_Black and white. *Description: Features: for Iphone Spare Parts 1.high quality; 2.original new ; 3.protective package; 4.offer all kinds of parts; 5.guarantee time:1 year. *All the iphone Parts must pass the inspection of our professional QC team; Delivery:2-3day working time;We can offer all kinds of mobile phone accessories; Product Warranty: We have good after-sales services. RZM company has over 10 years experience in this field. With the effort of our professional QC team and Purchaser team, we are able to supply the best quality of the products to our customers. Meanwhile, with the hard-working of our logistic department, the goods can be sent to our customers quickly and safely.If you have interests in our products, please contact us now, our sales team can do you the best favor and support. If we are not on line, please leave your name and contact details, eg. email, MSN, Skype, ICQ, telephone number etc. Email This BlogThis! Share to Twitter Share to Facebook 1 comment : All about Fast installers Blackberry 2012-2013- blackberry 8100 8100-450-b81-telefonica-instaladorrapido.exe - 4shared.com - online file sharing and storage - download - DeyviBox!! arribasplata blackberry 8110 8110-450-b81-telefonica-instal.exe - 4shared.com - online file sharing and storage - download blackberry 8120 8120-450-b52-telefonica-instaladorrapido.exe - 4shared.com - online file sharing and storage - download - DeyviBox!! arribasplata blackberry 8220 8220-460-b446-instaladorrapido.exe - 4shared.com - online file sharing and storage - download - DeyviBox!! arribasplata blackberry 8300 8300-450-b81-telefonica-instaladorrapido.exe - 4shared.com - online file sharing and storage - download - DeyviBox!! arribasplata blackberry 8310 8310-450-b52-telefonica-instaladorrapido.exe - 4shared.com - online file sharing and storage - download - DeyviBox!! arribasplata blackberry 8320 8320-450-b81-telefonica-instaladorrapido.exe - 4shared.com - online file sharing and storage - download - DeyviBox!! arribasplata blackberry 8520 8520_5.0.0_rel860_instalador_rapido.exe - 4shared.com - online file sharing and storage - download - DeyviBox!! arribasplata blackberry 8700 8700-450-b81-telefonica-instaladorrapido.exe - 4shared.com - online file sharing and storage - download - DeyviBox!! arribasplata blackberry 8900 8900_5.0.0_rel860_instalador_rapido.exe - 4shared.com - online file sharing and storage - download - DeyviBox!! arribasplata blackberry 9000 9000-500-b1004-instaladorrapido.exe - 4shared.com - online file sharing and storage - download - DeyviBox!! arribasplata blackberry 9100 9100-500-b1017-telefonicainstaladorrapido.exe - 4shared.com - online file sharing and storage - download - DeyviBox!! arribasplata blackberry 9300 9300-500-B1440-TelefonicaInstaladorRapido.rar - 4shared.com - online file sharing and storage - download blackberry 9500 9500_b230_instaladorrapido.exe - 4shared.com - online file sharing and storage - download - DeyviBox!! arribasplata blackberry 9530 auto loader full os bb 9530_4.2.0.128.exe - 4shared.com - online file sharing and storage - download - Wawan Syahroni Loader-SFI_9530_5.0.1041.exe - 4shared.com - online file sharing and storage - download blackberry 9630 9630 loader.exe - 4shared.com - online file sharing and storage - download blackberry 9650 loader new 9650.rar - 4shared.com - online file sharing and storage - download blackberry 9700 9700_instalador_rapido_rel554.exe - 4shared.com - online file sharing and storage - download - DeyviBox!! arribasplata blackberry 9780 9780_b863_instaladorrapido.exe - 4shared.com - online file sharing and storage - download - DeyviBox!! arribasplata blackberry 9800 9800_b695_instaladorrapido.exe - 4shared.com - online file sharing and storage - download - DeyviBox!! arribasplata blackberry 9850 SFI9850.rar password: busarbbs blackberry 9860 SFI9860.rar password: busarbbs blackberry 9900 9900_7_0Fast _Installers.rar - 4shared.com - online file sharing and storage - download blackberry 9930 SFI9930.rar Password: busarbbs CREDITS : REALUNLOCKER Club-berry.com __________________ Email This BlogThis! Share to Twitter Share to Facebook No comments : Older Posts Home Subscribe to: Posts ( Atom ) Please Log in Total Pageviews Sparkline 534891 Nokia BB5 Flash File Visitor Search Flash File Blog Archive ▼ 2013 ( 2 ) ▼ April ( 2 ) How To Unlock IPhone4 BB 04.12.05 Or 04.12.02 with... GPG_Dragon RJ-JACK RX,TX,VCC,GND Pinout.....BY_gsm... ► 2012 ( 2019 ) ► 2011 ( 324 ) Popular Posts Nokia E52 Only Vibrate 100%solved Nokia 1616 no light and insert sim all solution Nokia 1616 no light and insert sim Ways..... 1616 NO LIGHT AND INSERT SIM ITO XA AT ITO ANG TRICKS ... Samsung All Multiloader all in one exe. 2012 Samsung Multiloader all in one exe....thanks to edmond_jpj Apollo v4.21.exe Apollo v4.32B.exe Apollo v6.10.exe Becks2 Downloader v03 -... NOKIA N73 TT POD music player. NOKIA N73 TT POD music player. http://www.mediafire.com/?ueksw6563foi6rs NOKIA C2-00 WHITE SCREEN testad solution Nokia 5030c contact service solution 100% tested Nokia 5030c contact service solution 100% tested If you like my post just thanks advance Nokia 1280 New light solution Nokia 1280 New light solution Nokia 6303c no network good solution Nokia 1202 Always Headset display 1000000% new solution Nokia 1202 Always Headset display (DONE) Sony Ericsson XPERIA SO-03C unlock done==just here Sony Ericsson XPERIA so-03C unlock done gadget: SEtool Gold Activated + 2 cridets GPG Mini USB driver : QHSUSB_LOAD

http://forum.gsmhosting.com/vbb/attachment.php?attachmentid=297185&d=1357012399

Nokia asha 200 mmc problem salution see all


http://forum.gsmhosting.com/vbb/attachment.php?attachmentid=297186&d=1357014114

GPG_Dragon RJ-JACK RX,TX,VCC,GND Pinout.....BY_gsmfine-2013

GPG_Dragon RJ-JACK RX,TX,VCC,GND Pinout


RJ JACK Pinout


How To Unlock IPhone4 BB 04.12.05 Or 04.12.02 with superior sim Ultra+ by gsmfine

how to Unlock IPhone4 BB 04.12.05 Or 04.12.02 with superior sim Ultra+

how to Unlock IPhone4 BB 04.12.05 Or 04.12.02 with superior sim Ultra+

 iphone 4 bb 04.12.05 & 04.12.02 Perfect unlocking solution with Superior sim Ultra+
Hi, All, I m Zakria el Osta Fron Romania
I Buy From Superiorsim.com first 2 Pieces For Testing Purpose And I mVerry Happay And Satisfied,
Verry Apriciated Work, Great Release And I now Ordered 200 pieces For My Store. I write Here Full Review Superior Sim ULtra+ with Guide Thsi May Help More Peoples Coz As I know Upto Thousands Of IPhones 4 B 04.12.05 or 04.12.02 Now Locked And Not Working Coz Only Was One Way Official Factory Unlocking Also All Networks Factory Unlocking Server Down So This Time Verry Cool Release That Superior Guys And Superior Team Release That Sim Called Superior Ultra+ Release Verry Great Time, Now I start Tell To All Members How to Use ,Compability and Functions.
One More thing I wann Tell To all I write This Review Coz Some where I see Sombody Use My Name And Tell lie About this sim Coz I own Check Test Run And Then Write here
Compability With ios 6.0,6.0.1,6.1,6.1.1,6.1.2,6.1.3 (Also for Future Ios Release Its a ethod I write At last)
Baseband(Modem Firmware) Supported: 04.12.02 & 04.12.05 I also use With 04.12.01 Its Worked.
HOw to Use This sim:
Simple 2 Way TO use
1.For jailreak IPhoes
2.Non Atiated Or Without Jailbreak IPhones.
Full Guide with Pis I post My Next Post just within 1 to 2 MInute.
Watch Video how to work also:click here
or here http://youtu.be/UFWLTmY53ts

8/14/2013

Nokia 110 RM-827 version 3.4 latest flash files Free download

Nokia 110 RM-827 version 3.4 latest flash files Free download

Nokia 110 RM-827 version 3.4 Urdu latest flash files Free direct download only 3 files MCU,PPM,CNT just click on file for direct download 
1)MCU
2)PPM
3)CNT

Nokia 7900 Prism latest flash files Free download

Nokia 7900 Prism latest flash files Free download

Nokia 7900 Prism RM-264 Version 4.84 latest flash files Free direct download only 3 files MCU,PPM,CNT just click on file for direct download 
1) MCU
2) PPM
3) CNT

Nokia 801T latest flash files Free download

Nokia 801T latest flash files Free download

Nokia 801T RM-754 Version 28.4 latest flash files Free direct download only 3 files MCU,PPM,CNT just click on file for direct download 
1) MCU
2) PPM
3) CNT

Nokia 808 latest flash files Free download

Nokia 808 RM-807 Version 112.20.311 latest flash files Free direct download only 3 files MCU,PPM,CNT just click on file for direct download 
1) MCU
2) PPM
3) CNT

Nokia 1280 RM-647 latest flash files Free download

Nokia 1280 RM-647 Version 7.0 latest flash files Free direct download only 3 files MCU,PPM,CNT just click on file for direct download .
Version 7.0 Urdu Flash files
1)MCU
2)PPM
3)CNT